How to Extract Embedded Images from Outlook Emails? Explained


In recent times, digital forensics investigators often search images in Outlook and other email clients. Images are one of the core pieces of digital evidence that can be used to prosecute perpetrators of crimes. However, separating useful images from the vast amount of data is not an easy task. Moreover, as images can be manipulated, hidden evidence, or destroyed, it adds a layer of complexity for law enforcement agencies.
Not to mention that criminals continue to become smarter, so detectives must stay one step ahead of them. That’s why in this write-up, we have included the working steps of how to extract multiple inline images from Outlook. We also have one advanced solution that can help to search Outlook images for an advanced level of Outlook forensics using the tool. So, let’s see what makes manual image searching so difficult in email clients like Outlook.
Table of Contents
- Why Outlook Images Matter in Digital Forensics?
- Challenges in Searching for Image Attachments in Outlook
- Solution 1- How to Extract Inline Images from Outlook Email?
- Solution 2- How to Search Images in Outlook Email Client?
- Limitations of this Manual Solution
- Solution 3- Extract Outlook Emails for External Review of Images
- Limitations of this Manual Solution
- Solution 4- How to Extract Single Embedded Images from the Outlook attachment
- Limitations of this Manual Solution
- Solution 5- Easiest Ways to Search Images in Outlook During Investigations?
- How 5th solution Beats the Traditional Approach of Image Searching
- Conclusion
Why Outlook Images Matter in Digital Forensics?
Images play a very crucial role in digital forensic investigations. Unlike plain text, images can convey various things, like:
- Explicit evidence like photographs, screenshots, or any scanned documents.
- Some hidden information that might be embedded metadata such as EXIF data (date, time, GPS locations that can identify location from photo, etc.)
- Steganography is or concealment of data that contains files or messages hidden within images.
- Critical identifiers, like personal details like IDs, credit cards, or handwritten notes captured in photos.
In court, properly extracted and preserved image evidence can make or break a case. Whether it’s proving the authenticity of a threatening email or uncovering fraudulent documents, forensic analysis of images in Outlook plays a key role in modern investigations.
Challenges in Searching for Image Attachments in Outlook (Manual Approach)
Outlook itself has a free-to-use web client and a paid desktop-based client included with the Microsoft 365 service. Depending on the sophistication involved in the case, detectives may have to deal with either of the two. Regardless of the source, there are quite a few ways in which image searching becomes problematic. Let’s find out how
- Microsoft Outlook updates Outlook. With every new version, Microsoft adds new features and removes old bugs and vulnerabilities from its systems. After a decent set of changes, the old app versions are no longer supported. The same is true for Outlook clients, so if investigators themselves are using an older Outlook version, there is a high chance that it fails to open some new image formats.
- Sometimes images might not be as attachments but rather embedded using HTML code. This tactic is often used to hide images within messages, as Outlook does not allow embedded images to be viewed in a browser or desktop. The images need to be extracted with the help of external code.
- Outlook has a rendering engine, which might complicate the task and challenge in digital forensics investigations. Its GPU acceleration features may prevent certain images from displaying correctly and complicate forensic review.
- Handling large volumes of data in case management of investigators often deals with thousands of emails spanning years. Manually locating relevant images is not only inefficient but also increases the risk of missing key evidence.
- Opening and downloading the attachments can alter the authenticity of email files for any email metadata analysis. This jeopardizes the authenticity and admissibility of evidence in court.
Solution 1- How to Extract Inline Images from Outlook Email?
Outlook allows its users to simply attach the images either in the message body, i.e inline image, or as an attachment.
Step 1. First, select the email in which you want to extract images and open emails in the preview window.
Step 2. Then, tap on the image and Save as a picture option.
Step 3. Now, in the local, select the location and specify the file name, and select the save as type to save the image.
The embedded Putlook image must be saved in the specified location, which you have been given.
Solution 2- How to Search Images in Outlook Email Client?
Though there are very limited manual methods, investigators may still use them in smaller cases, as they don’t have any means to determine whether it’s authentic or not.
Step 1. Open Outlook, navigate to the mailbox or folder where you want to search for images.
Step 2. Click on the Search bar at the top and search keyword in Outlook for image attachment, eg.
hasattachments:true AND (jpg OR png OR bmp OR gif
Step 3. Press Enter to see filtered results containing image attachments.
Step 4. Manually review each email to check relevance and download attachments if needed.
Limitations of this Manual Solution
- This solution will only find images that are explicitly attached, i.e., embedded images in HTML emails may not appear.
- It does not automatically extract complete data i.e EXIF data and forensic timeline analysis
- This is the time-consuming method, especially for large mailboxes.
- It does not have any advanced digital forensic search methods like fuzzy, proximity, etc.
Solution 3- Extract Outlook Emails for External Review of Images
Step 1. Open the Outlook desktop client and go to File>>Open & Export>> Import/Export
Step 2. Select Export to a file >> Outlook Data File (.pst)
Step 3. Choose the folders/mailboxes to export (Inbox, Sent Items, etc.).
Step 4. Specify a location to save the PST file.
Step 5. Open the PST file in another Outlook instance or a compatible tool to manually review attachments.
A thorough guide to know how to export Office 365 mailbox to PST file format.
Limitations of this Manual Solution
- Exporting a large mailbox may take hours or even days, which could be the biggest disadvantage for the investigators.
- Manual review of images is required to export, no automated filtering.
- Does not handle cloud-based mailboxes (Office 365) directly. It requires sync/download.
Solution 4- How to Extract Single Embedded Images from the Outlook attachment
Step 1. Identify the image that contains HTML-embedded images (often base64-encoded)
Step 2. Use scripts or Outlook add-ins (like VBA macros) to scan email content for img tags or base64 strings.
Step 3. Decode base64 to save images as separate files.
Step 4. Now review and categorize extracted images manually.
Limitations of this Manual Solution
- This requires a major technical knowledge of scripting or VBA
- This can even miss images embedded in complex HTML structures.
- Time-intensive for large data scale, as it is not scalable.
Solution 5- Easiest Ways to Search Images in Outlook During Investigations?
MailXaminer is the first and only choice of law enforcement agencies for collecting digital images. It has an inbuilt portal to view and advanced filters to pick out photos stored at the source.
Moreover, it assists forensic teams in identifying the text present in the images with an on-site OCR analysis. This tool automates the data filtering process, thereby eliminating the time wasted during manual segregation.
It helps law enforcement agents build a case against the criminal in the shortest time possible. Not to mention that the tool can scan for loose files and attachments and compile them into the evidence list on its own.
The tool completes the process of searching images in Outlook in 9 simple steps:
Step 1. Select the source (Outlook Desktop and Cloud are both available)
Step 2. Now, in the settings tab, configure scanning parameters as shown in the screenshot below.
Step 3. Attach the file (Browse and pick the Source file, e,g PST)

Step 4. Preview the indexed source data (Get an early indication of what all data is present)
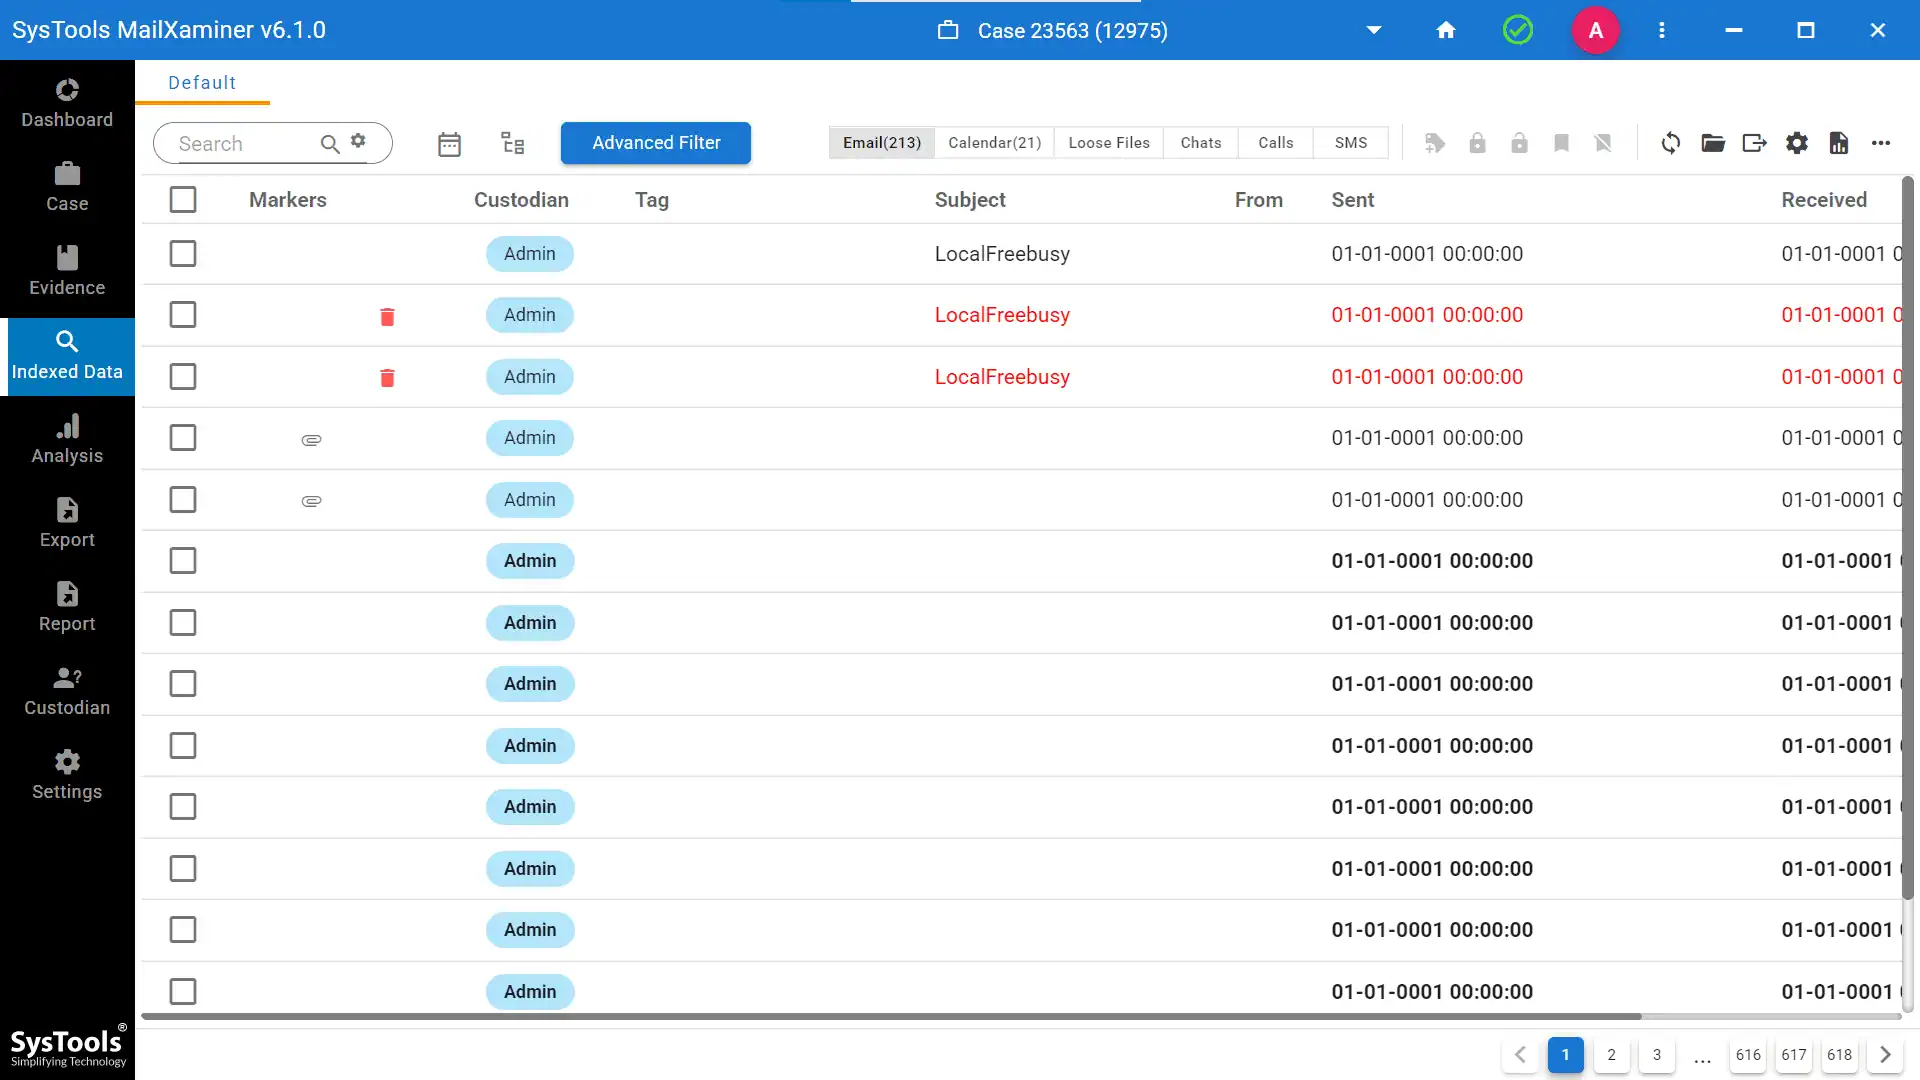
Step 5. You can also see the embedded images in the Outlook file through this option. (find attachment in Outlook)

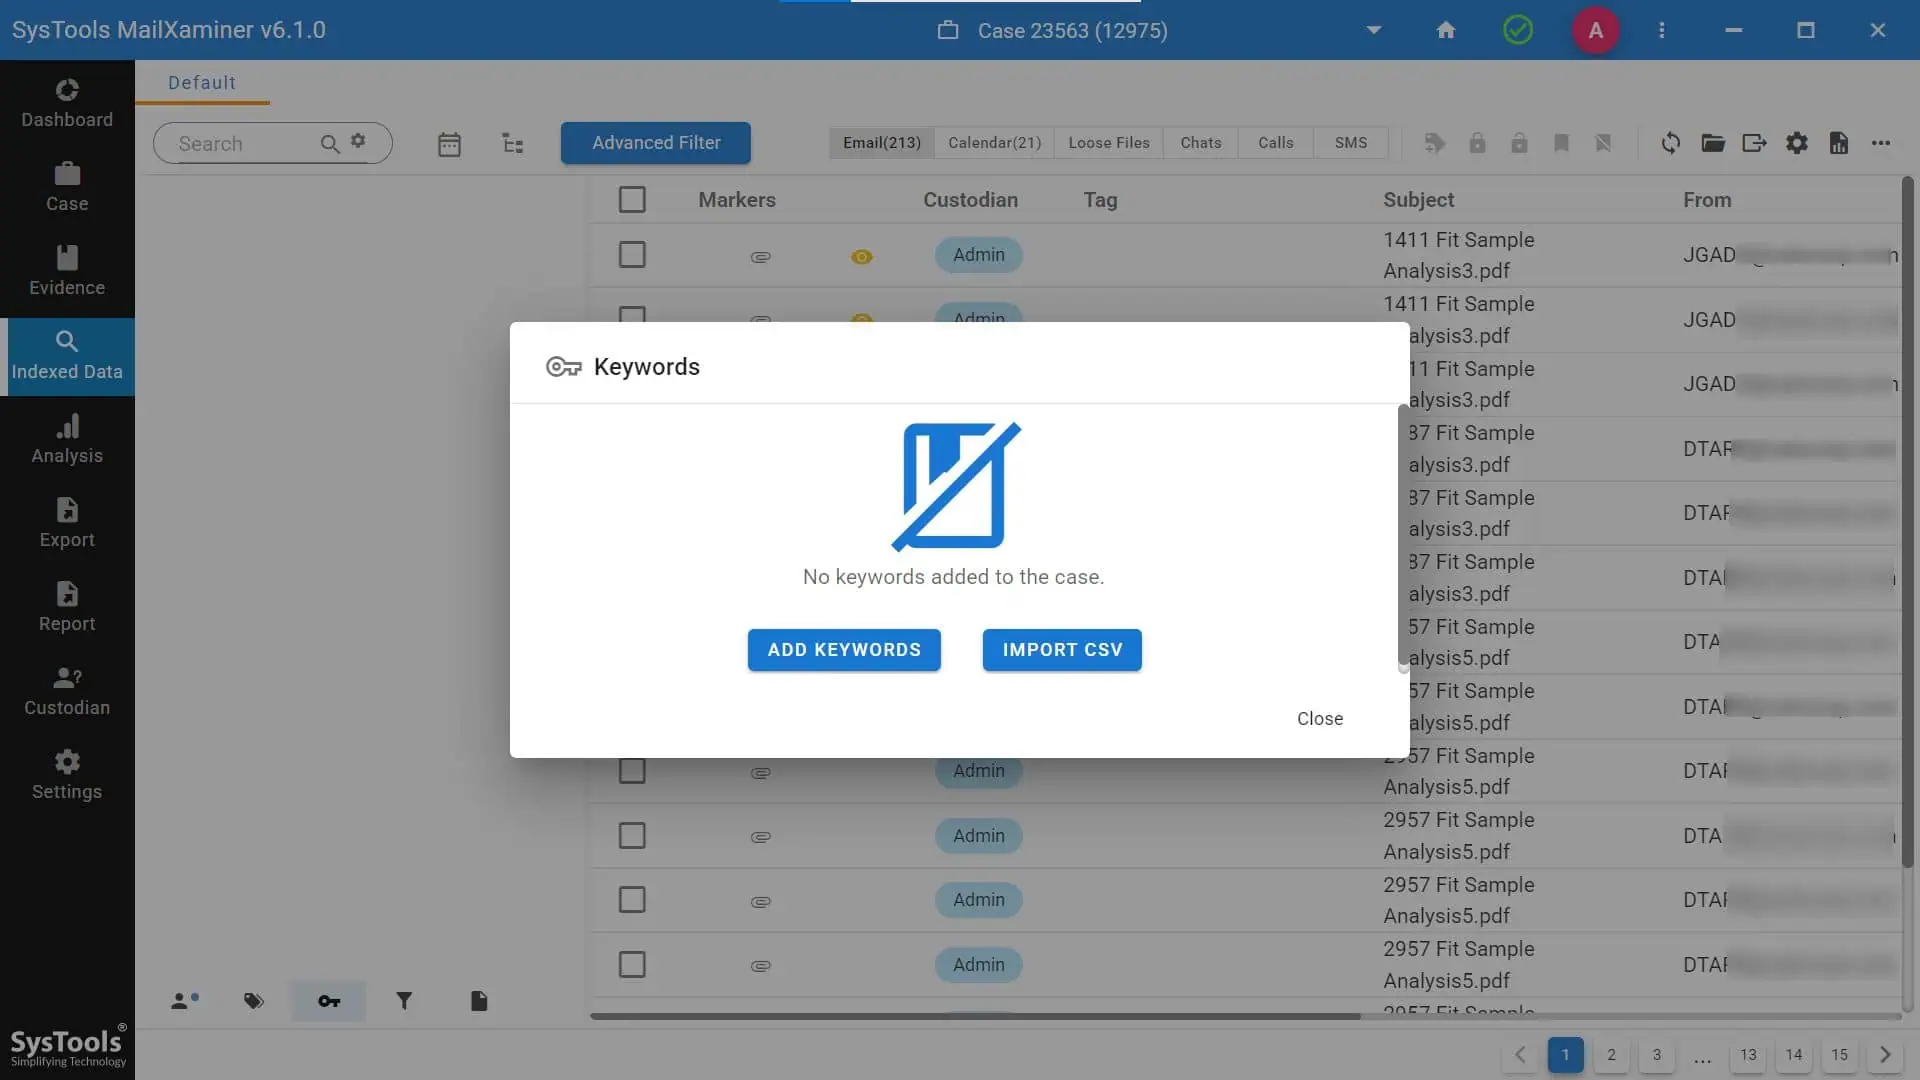
Step 6. Filter relevant information (use the categories, tags, keywords, and media tabs )

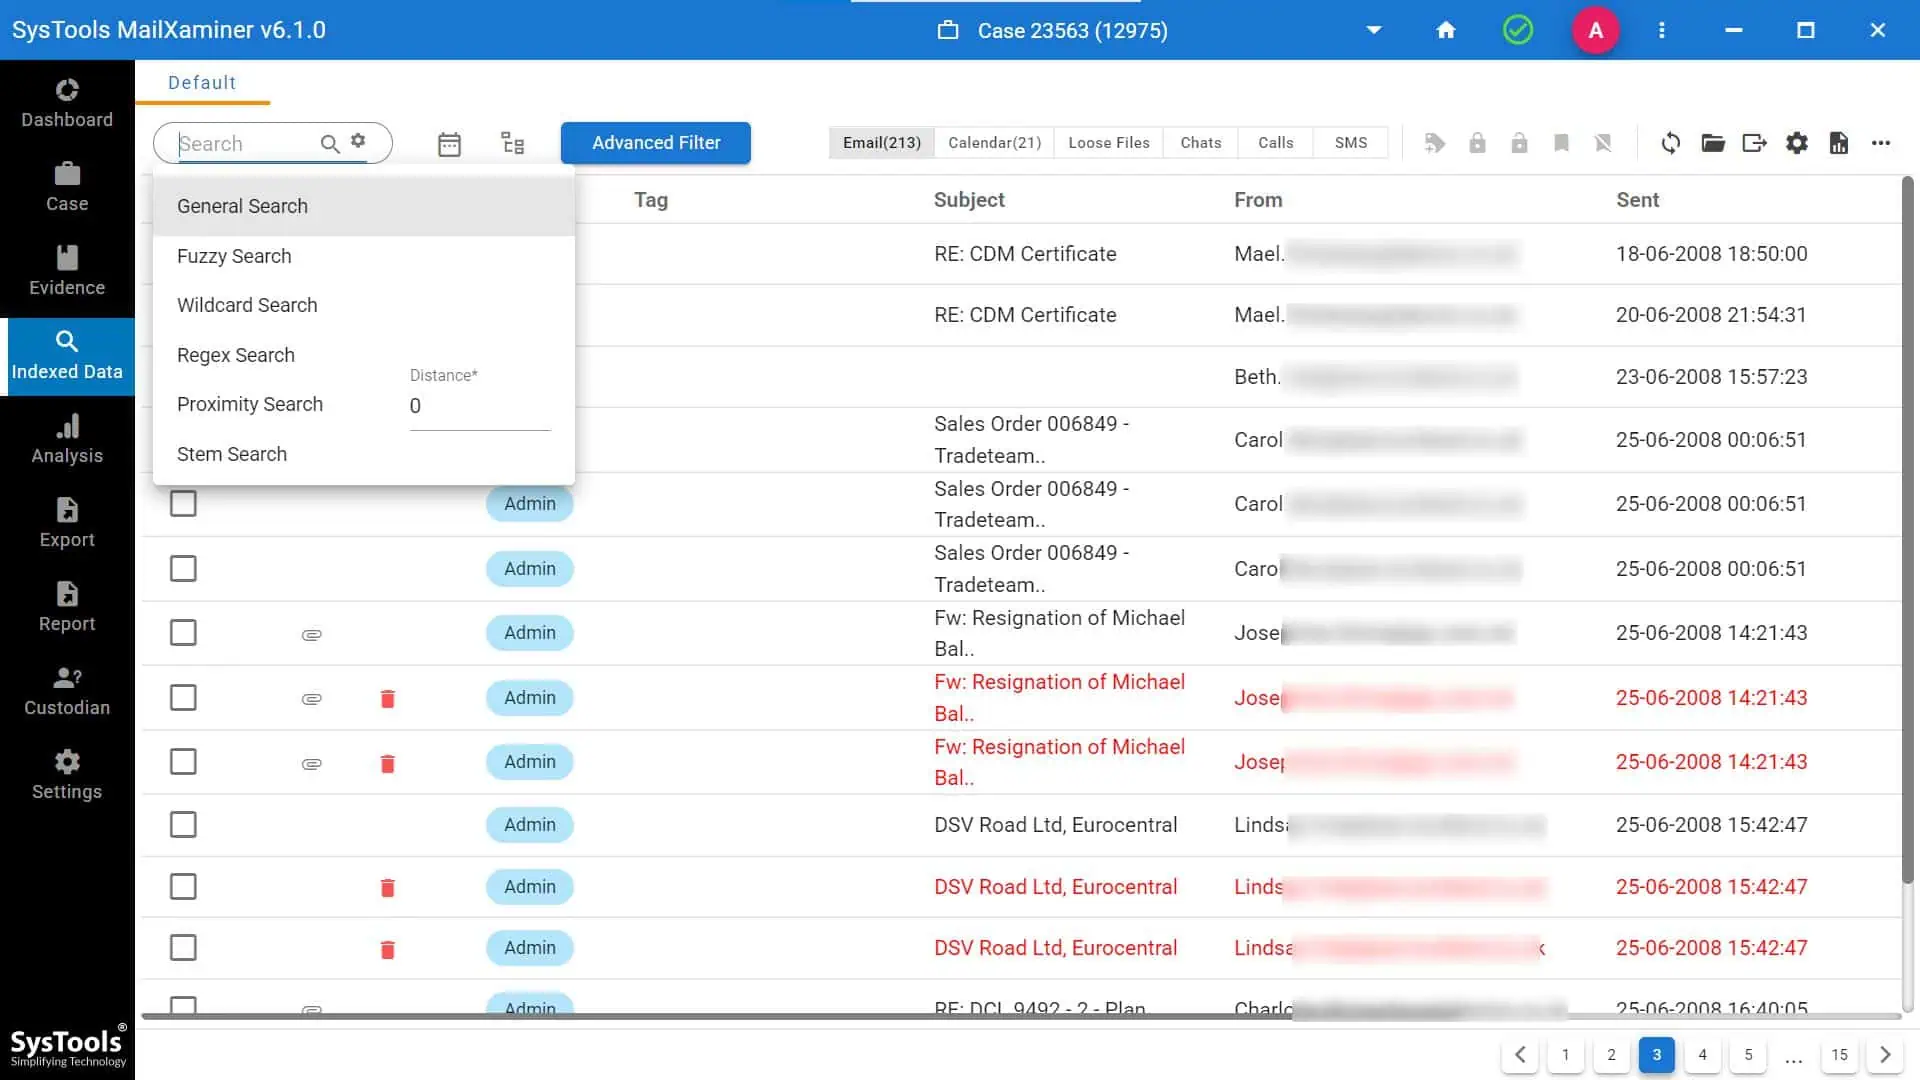
Step 7. Search filtered dataset (Find key elements using different searching algorithms)
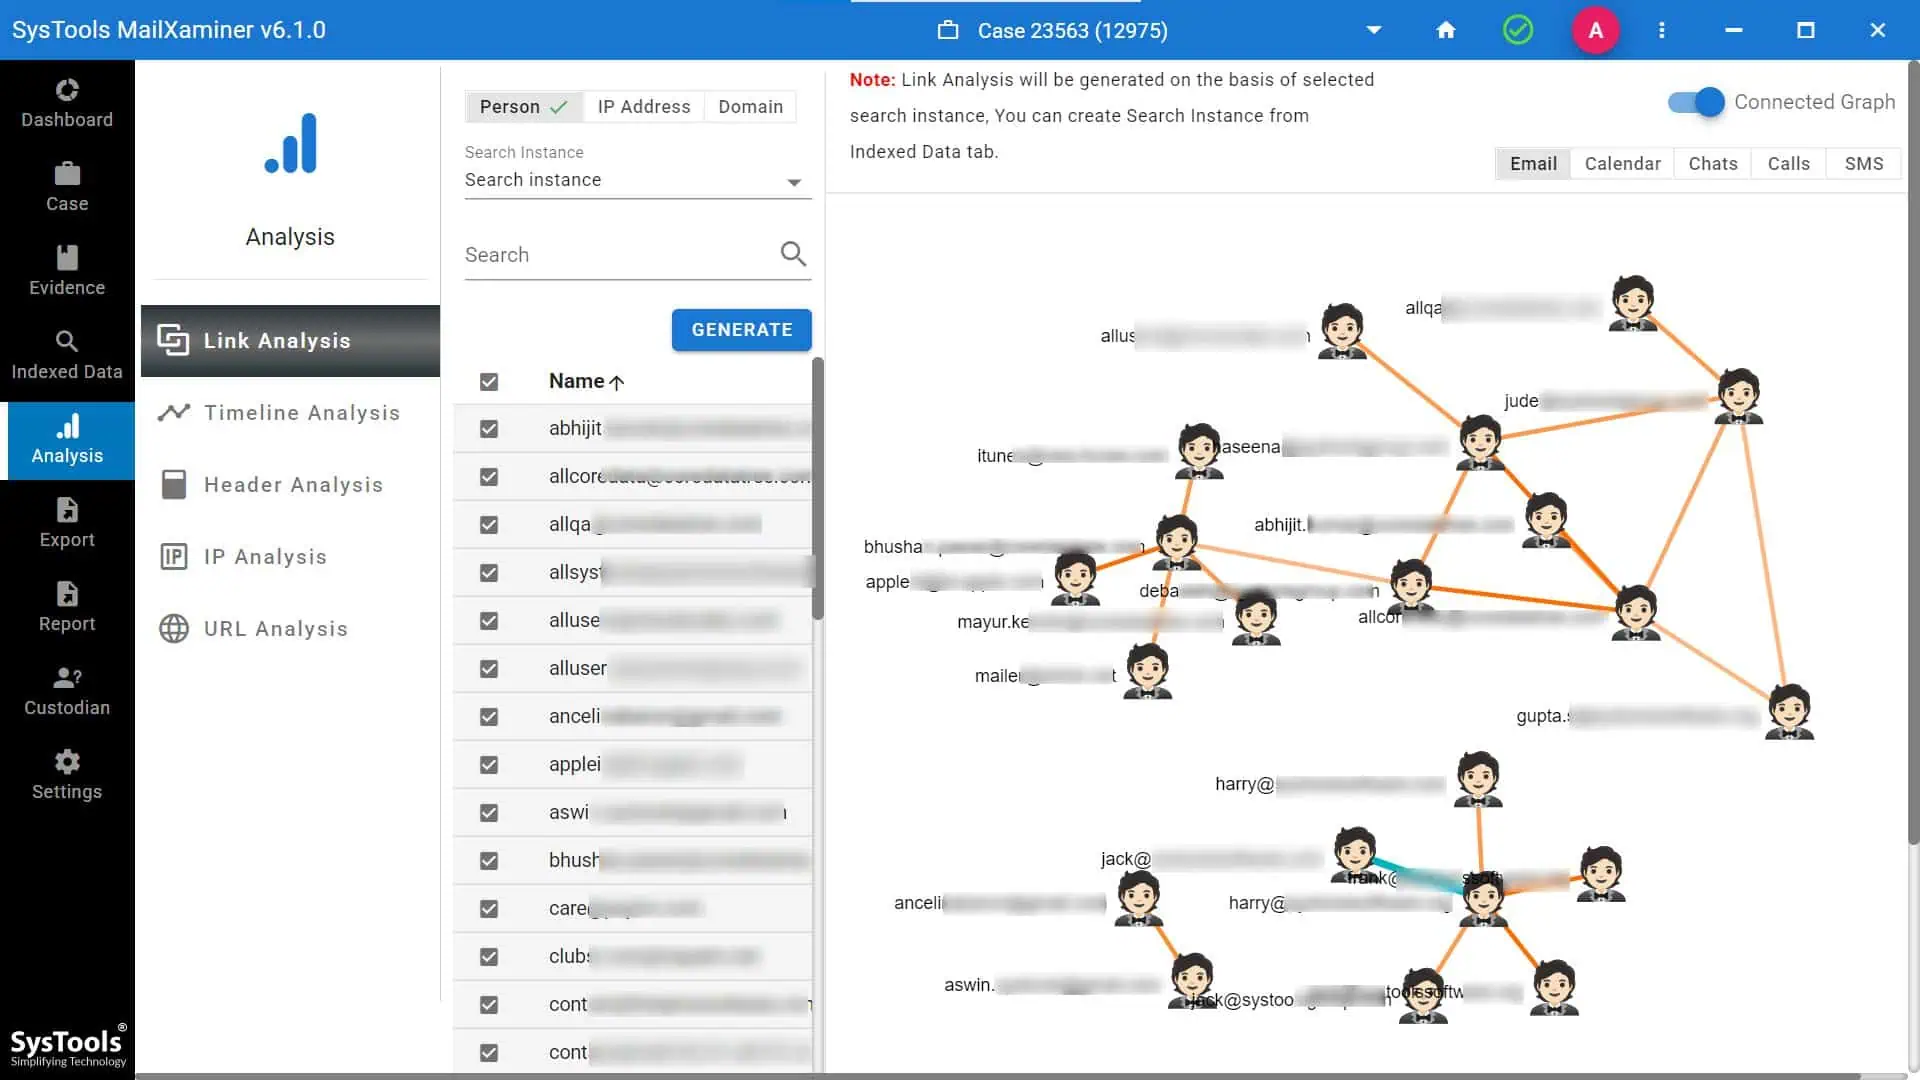
Step 8. You will get the option of link analysis (See how many items have been sent between suspects)
Step 9. Visualize selected info (See the data timeline with interactive charts and graphs)

Step 10. Export resultant examination (Do final selections & generate a complementary report)

How Profession Tool Beats the Traditional Approach of Image Searching
Outlook as a product exists both in the cloud and on-premises. So, investigators may face a scenario where both products are being used simultaneously for sending and receiving explicit images of victims.
This makes it difficult to search images in Outlook, as detectives have to bounce between cloud and desktop versions. However, with this Email Analysis Software, this is no longer a hurdle for investigators.

The reason is that the tool can add new evidence from multiple sources during the investigation itself. Moreover, this entire process can be done in-house without closing the current instance of the tool. Simply press the plus ”Add New Evidence” icon present at the top right-hand corner of the evidence tab and choose your new source (Microsoft Outlook for the desktop version and Office 365 for the cloud).

In the legal framework, any changes made to the evidence make it void and inadmissible before a court of law. This is true for digital images as well. That is why investigators must be super careful while handling the files.
To make sure that evidence can be understood without unwarranted changes, the tool includes an OCR scanner. This separates out the text content present in images. This is especially helpful in scenarios where credit card numbers are present in files.
Manual scanning and sorting require a lot of effort and end up wasting the precious time of investigators. Moreover, manual searching is the same whether you want to find 10 images or 10,000. On the other hand, the tool offers several different search parameters that can be applied on a situational basis.
Conclusion
In this write-up for professionals, we gave them details on how to search images in Outlook clients. Not only did we cover the major problems during default viewing, but we also gave a workaround to each of them. Moreover, to make evidence gathering easier, instructions to use an automated forensic utility are present within the article itself. Looking at the robust set of features, no one can deny that the tool is the best possible choice for getting images out of Outlook.