USB Forensics: Ultimate Guide for USB Device Forensics


USB forensics is the analysis of external digital storage agents. This mechanism for connecting computers with peripheral devices has all sorts of use cases, so it’s not surprising that it is used to send, share, and store large amounts of data.
This widespread use of USBs means it’s commonplace and most often the starting point for many digital investigations. In this write-up, we will uncover the mechanisms investigators can deploy to procure, process, and present the findings inside universal serial buses. There is no better place to begin than to understand what a USB device is, so let us start from there.
Understand the USB Devices and its Forensics Process
From small pen drives to large SSDs, size (physical and logical) and types of USB devices vary greatly. So does its protocol (USB 1.0, 2.0, 30. etc), there have been many generations of USBs with notable upgrades in every subsequent edition. Even the storage mechanisms employed in these vary and can be FAT, NTFS, or exFAT. Even when this evidence has low volatility and can retain the data present inside them for a long time, ignoring it may mean losing out on critical evidence. Therefore, whenever a USB drive/flash/stick/storage is found forensics of such evidence must be carried out with a set of procedures. Here is an extracted version as per Interpol‘s Documentation:
- Quarantine the scene by restricting access
- Build two bit-by-bit copies of the USB device in a (physical full copy or Logical part copy)
- Keep the master copy in a secure location and check the secondary copy for deleted files, metadata, network traffic, and other relevant artifacts.
- Present all these findings in a report format.
The need for USB flash drive forensics is going to explode as from the end of 2024, even those devices that resisted adding a USB dongle must have a USB C port for charging. Due to a European parliament’s legislation on mandating USB C as the standard port for all devices.
It also means that USB which was a multi-functional information exchange portal, can also be used to charge devices as well. However, the charging feature is many times used by nefarious entities to fry the internal circuitry of the USB storage.
This brings in the question of what other threats are there that can compromise the integrity of evidence inside USB ports.
Challenges During USB Forensics
Apart from permanent erasure and device destruction, there are other less violent but more problematic ways of evidence erasure.
Hiding data: Criminals with a deep knowledge set may be able to make the data invisible from basic retrieval mechanisms. Using reserve locations, slack space, and extended attributes. This requires extra time and effort on the part of the investigator, delaying the overall forensics exercise.
Encrypted files: This is yet another challenge, many pen drives now come with highly secure password mechanisms. If a forced break-in is attempted it may trigger self-destruction.
Trail Obfuscation: Creating multiple copies and deleting the original ones, to mix-match the timeline criminal may mislead and confuse the investigators.
Anti Forensics attacks: There have been instances where seemingly innocent-looking files end up being digital booby traps, They may contain malware, logical/zip bombs, or other threats that sabotage the very tools a Digital forensic analyst relies on.
So now the investigators are made aware of possible problems it is time to start the digital analysis.
First Step of USB Flash Drive Forensics: Image Creation
- Launch the FTK Imager
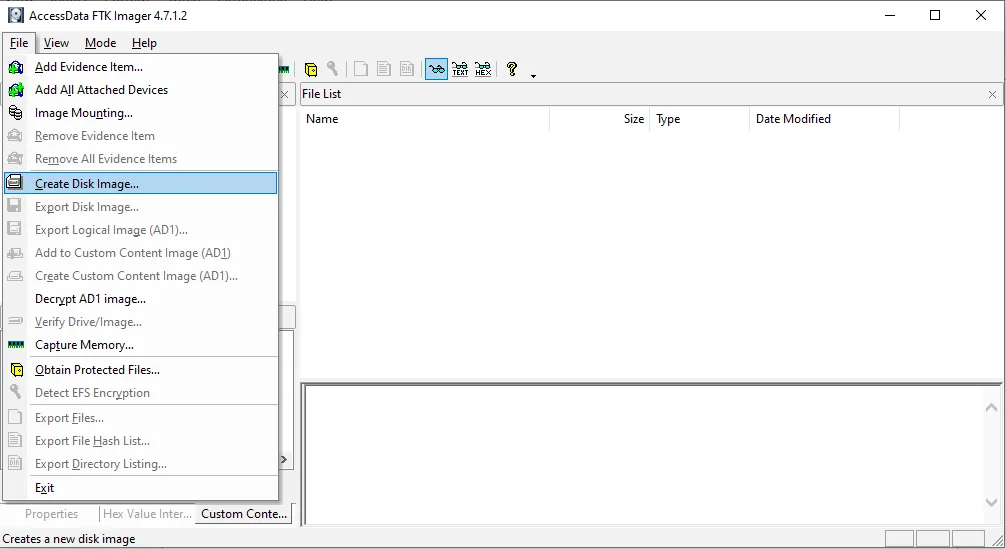
- Go to File
- Create Disk Image
- Choose the File type(Full, Logical, etc)
- Browse for File
- Choose a Location
- Start
USB Forensics Methods to Get Meta-Data Information on Windows
Once both the Master and working copy are made you are free to perform the metadata analysis. Windows machine holders have a lot of built-in features that they can make use of so let us discuss them one by one.
Event Viewer
- Press Windows + R.
- Type “eventvwr.msc” in the Open box and press Enter.
Use the table below to view the Event Viewer data:
| Source | Trigger Condition | Event ID | Category | Event Viewer Path |
| DriverFramework-Usermode | First connection | 10000 | Connection | Applications and Services Logs\Microsoft\Windows\DriverFrameworks-UserMode\Operational |
| UserPNP | Installed or updated | 20001 | Installation/Update | Applications and Services Logs\Microsoft\Windows\UserPNP\Operational |
| WPD-ClassInstaller | Successful Installation | 24576 | Installation | Applications and Services Logs\Microsoft\Windows\WPD-ClassInstaller\Operational |
| Plug and Play (detailed tracking) | Device connection | 6416 | Connection | Windows Logs\System |
| Object Access Audit | Handle request | 4656 | Object Access | Windows Logs\Security |
| Object Access Audit | Attempt to access an object | 4663 | Object Access | Windows Logs\Security |
| Partition Diagnostic | Connection and ejection | 1006 | Connection/Ejection | Applications and Services Logs\Microsoft\Windows\Partition\Diagnostic |
| NTFS | Connection | 142 | Connection | Applications and Services Logs\Microsoft\Windows\NTFS\Operational |
| StorSVC Diagnostic | Connection | 1001 | Connection | Applications and Services Logs\Microsoft\Windows\StorSVC\Diagnostic |
| DriverFrameworks-UserMode | Connection | 1003, 1004, 2000, 2001, 2003, 2004, 2005, 2006, 2010, 2100, 2101, 2105, 2016 | Connection | Applications and Services Logs\Microsoft\Windows\DriverFrameworks-UserMode\Operational |
| DriverFrameworks-UserMode | Ejection | 1006, 1008, 2100, 2101, 2102, 2105, 2106, 2900, 2901 | Ejection | Applications and Services Logs\Microsoft\Windows\DriverFrameworks-UserMode\Operational |
| Kernel-PnP | First connection | 400, 410, 430 | Connection | Windows Logs\System |
| DeviceSetupManager-Admin | First connection | 112 | Connection | Applications and Services Logs\Microsoft\Windows\DeviceSetupManager\Admin |
If you don’t see any USB log events ID in this table then it means that the Event Viewer is not permitted to log such events. Enabling them now won’t display any historical activity that took place before. So it means you have to look someplace else to track USB connection/ejection, and data read/write info. Not to worry as we have plenty of other ways.
Registry Editor
- Press Windows + R.
- Type “regedit” in the Open box and press Enter.
- You might get a popup warning press Yes and Continue.
- On the Registry Editor’s search bar put
Computer\HKEY_LOCAL_MACHINE\SYSTEM\CurrentControlSet\Enum\USB
Contains information on all USB devices
Computer\HKEY_LOCAL_MACHINE\SYSTEM\CurrentControlSet\Enum\USBSTOR
For storage-specific USB forensics
Although, you can perform analysis on Registry Editor itself. It is better to, exercise caution as it may cause unnecessary changes in the RE leading to the ineligibility of evidence gathered from this method of USB flash drive forensics. Instead, you can utilize the inbuilt export option of the Registry Editor to pull out a report.
Select the folder > right click, choose Export or Select the Folder > Go to File menu > Export.
You can choose either of the paths, both end up opening an Export window where you can select the location and the format (.reg or .txt) of the USB device Registry editor data.
This output data (if generated in text format) is free to open without the risk of changing the underlying values.
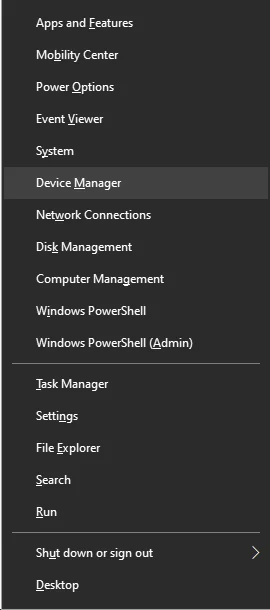
Device Manager
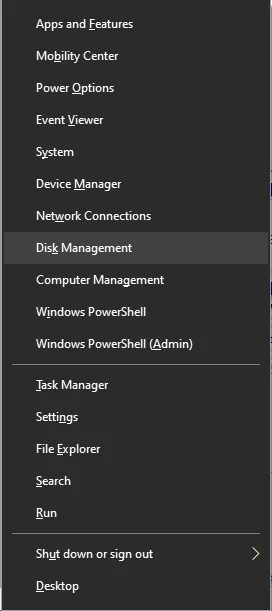
A shortcut way to launch the Device Manager inbuilt portal is to Press the Windows + X keys together, then use the cursor, or down arrow keys (+ Enter) to select and open it.
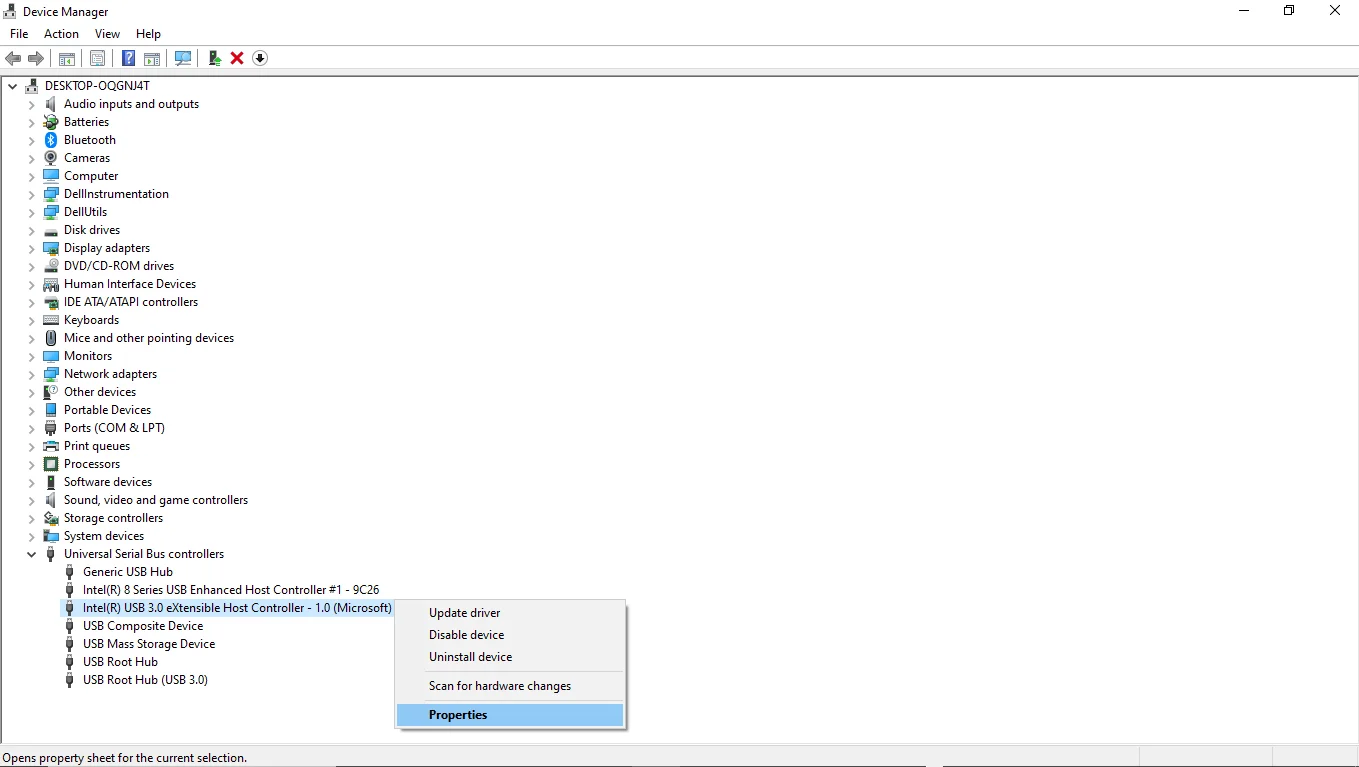
 To view all the available USB devices for formal forensics, you need to expand the Universal Serial Bus controllers section.
Then select any one right-click and select Properties (or use the properties icon from the top toolbar). You may as well make Device Manager use of the Action tab and select the Properties option from there.
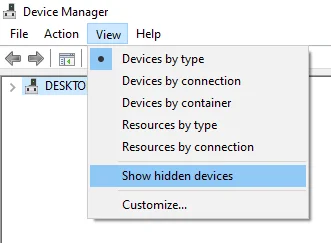
If your device is not visible, then it is hidden. To undo this setting, click on View > Show hidden devices. (The unhidden USB objects are characterized by their semi-transparent icon)
On the USB Stick Properties window, you have 5 different tabs:
- General: Basic info contains type, manufacturer, and location (PCI).
- Driver: Covers Provider, Date, Version, and Signer
- Details: Technical specifications (hardware IDs, device instance ID, etc).
- Events: Log of device events (connect, disconnect, errors).
- Resources: System resources used by the device.
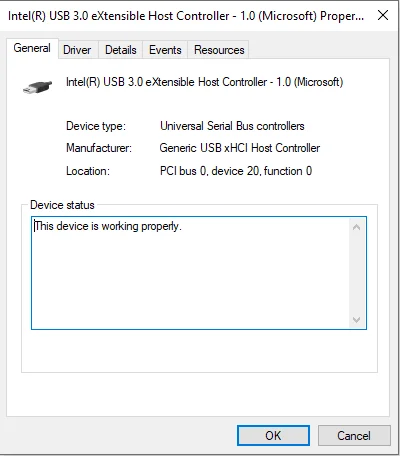
Be careful not to change the original condition on the evidence, as the Properties/Rightclick submenu has provisions to update drivers, and disable, or uninstall USB devices.
You can copy all the property values and paste them into an external spreadsheet/text box. However, this has to be done one by one manually as the Device Manager lacks a direct export mechanism.
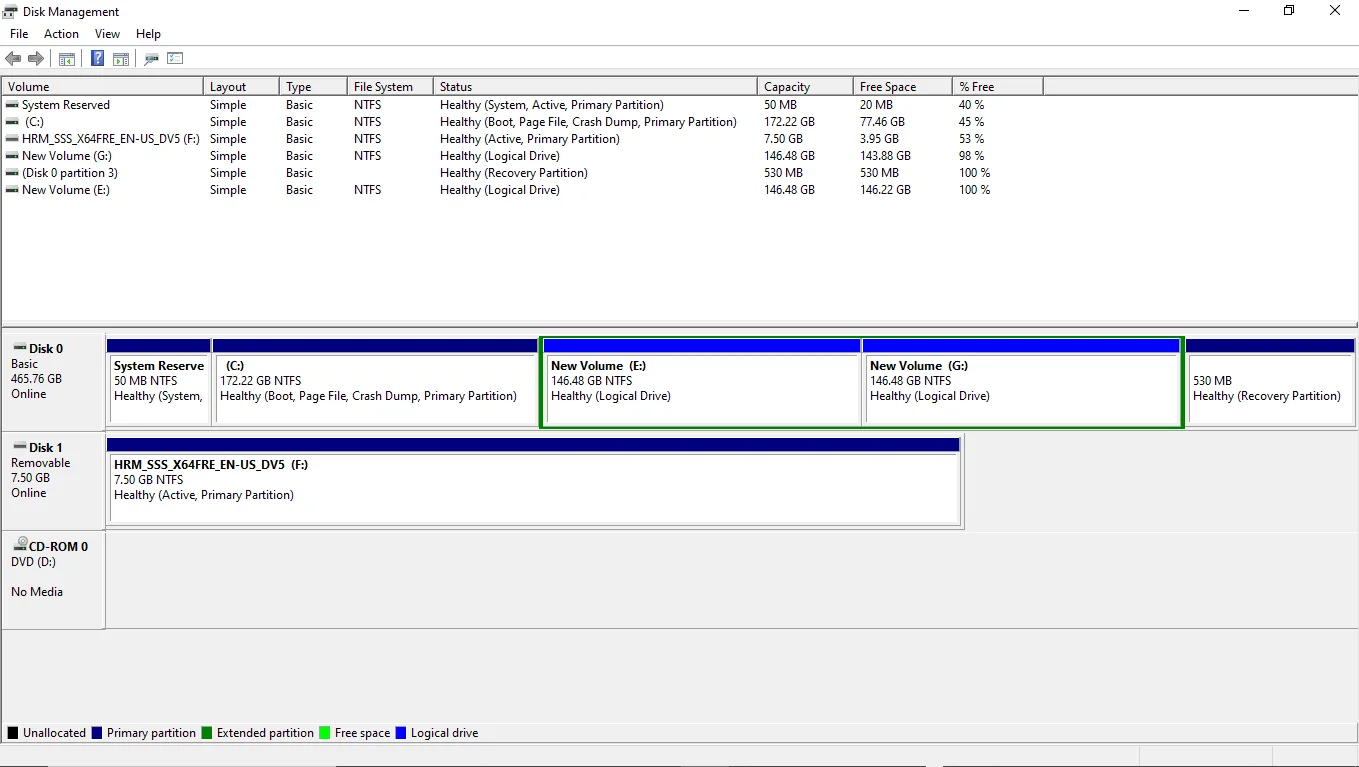
Disk Management
Another Windows application that can be used specifically for forensic analysis of USB storage is the Disk Management portal.
Hold the Window + X keys together and click on the Disk Management app.
Volume name, layout, type, Status, total capacity, file system, free space, % free in a neat tabular format.
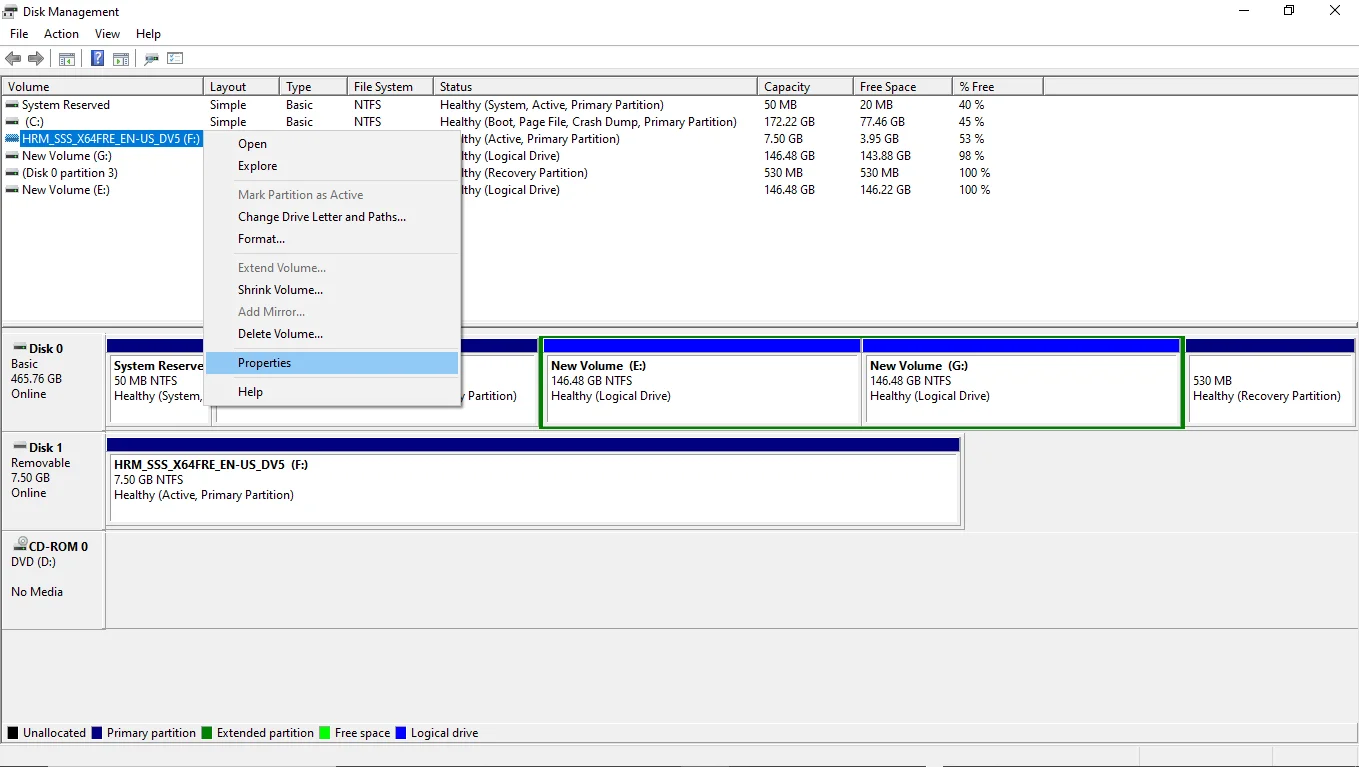
You can right-click on any USB storage stick/drive/ and get access to its properties field as well.
Best Way to Conduct USB Device Content Forensics
If the USB evidence has any one of the 80+ file formats supported by MailXaminer then you need not look anywhere else to analyze the content.
This Email forensics software can either take direct input of raw zip files containing photos, videos, email formats, text, etc, or perform forensic analysis of the E01 image file of the USB device in question.
Conclusion
USB forensics is essential in modern digital investigations. From analyzing deleted files to identifying metadata through tools like FTK Imager and Windows Registry, this process offers invaluable insights. As USB-C becomes universal, the scope and need for USB flash drive forensics will only grow.